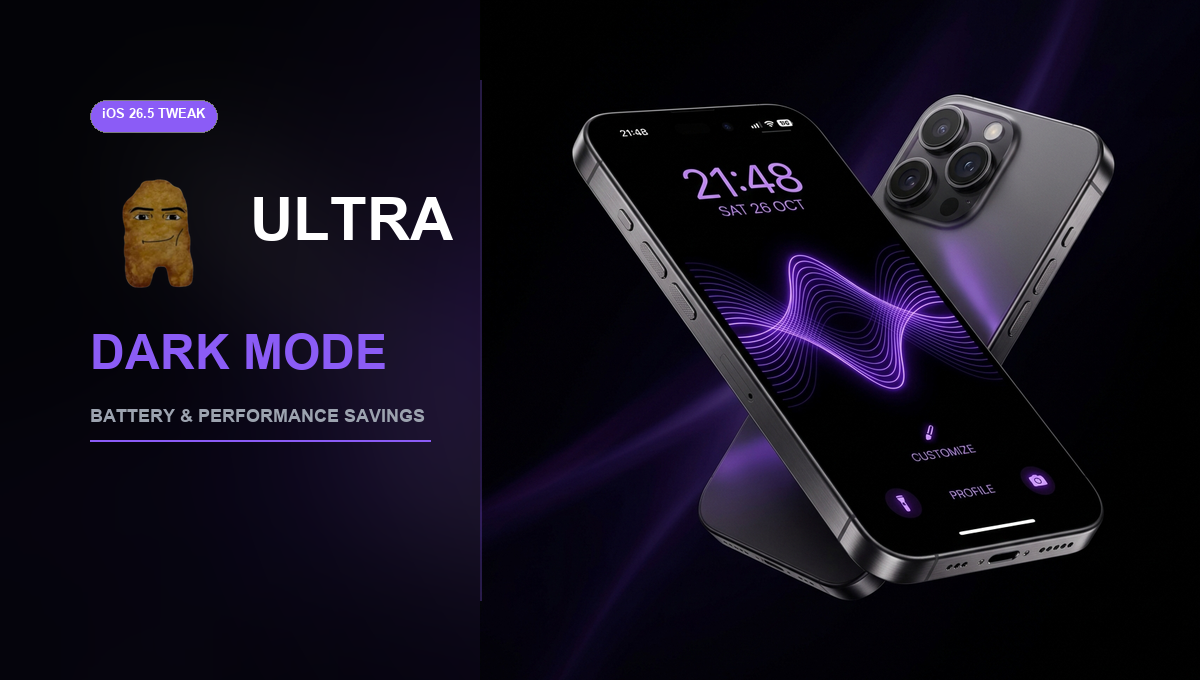
ULTRA Dark Mode ENABLED on iOS 26.5!
Supercharge your iPhone customization and unlock substantial battery preservation. Discover how to configure the ultimate dark mode setups using native iOS liquid glass, reduced transparency, and show borders accessibility features.
Introduction: Redefining the Dark Mode Experience
For years, iPhone users have appreciated the visual comfort and modern aesthetics of iOS Dark Mode. Enabling Dark Mode is widely considered superior to relying on standard light layouts for many reasons, including a sleeker layout, reduced eye fatigue, and dramatic improvements in contrast. However, the default dark system options provided in Apple settings do not represent the absolute limits of your hardware. By applying advanced adjustments, you can unlock an Ultra Dark Mode on your iOS 26.5 device.
This comprehensive customization guide walks you through the step-by-step process of configuring a super-dimmed, high-contrast, true-black environment on your device. Whether you want to optimize your user interface for low-light browsing or you are aiming to maximize the hardware efficiency of your screen, these hidden modifications deliver an exceptional aesthetic experience.
The Science of OLED Displays & Battery Preservation
The primary technological benefit of adopting an Ultra Dark Mode relates to display engineering. On iPhones equipped with a high-end OLED display, every single black pixel represents a light-emitting diode that is physically turned off completely. Unlike LCD screens, which require a uniform backlight to project dark colors, OLED panels illuminate pixels individually.
When your interface displays a true black background (#000000), those dark regions consume zero power from the battery. By keeping 80% to 90% of your screen pixels deactivated, you can substantially extend the daily battery life of your device. Every pixel that is turned off directly translates to reduced energy draw, allowing you to maximize screen-on time while maintaining hardware longevity.
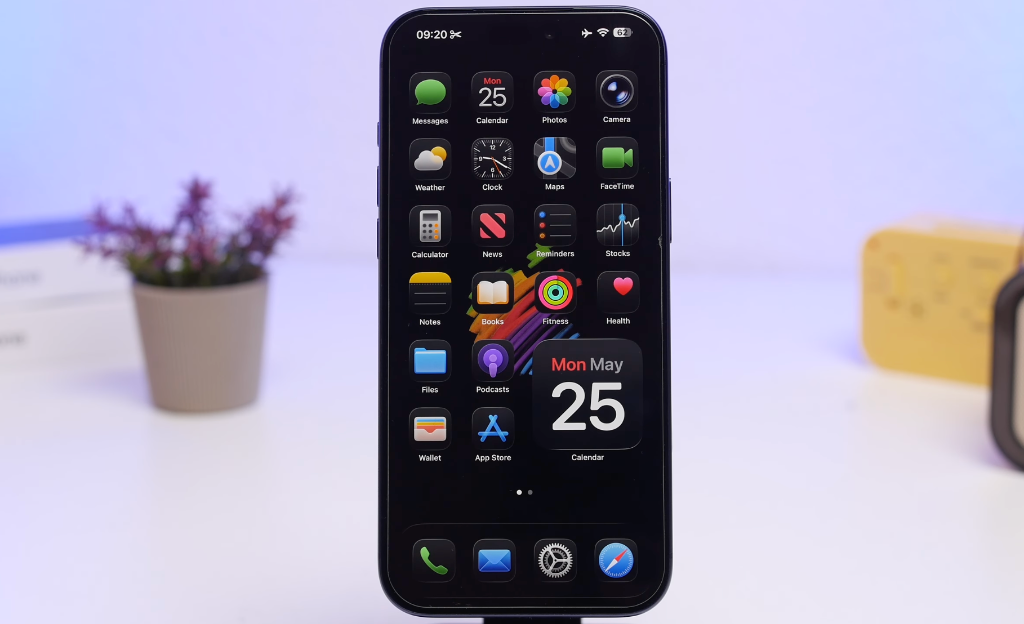
Step 1: Establishing the Perfect Pure Black Wallpaper
The foundation of a successful Ultra Dark Mode setup is your choice of wallpaper. Standard colorful backgrounds will continue to draw power even when dark settings are active. To maximize efficiency, you must select a background image that is predominantly black, ideally holding 80% or 90% dark coverage.
A perfect example is a minimal dark background displaying a clean outline like a purple glowing Apple logo, surrounded by vast regions of absolute black. Not only does this look incredibly futuristic, but it also creates the ideal battery-saving canvas. You can explore a hand-curated library of optimized OLED templates in our Nugget iOS Wallpapers and Templates Gallery to download pixel-perfect backgrounds for your lock screen.
Step 2: System-Level Dark Mode & Custom Scheduling
Before configuring advanced adjustments, you must ensure your basic system dark settings are locked in properly:
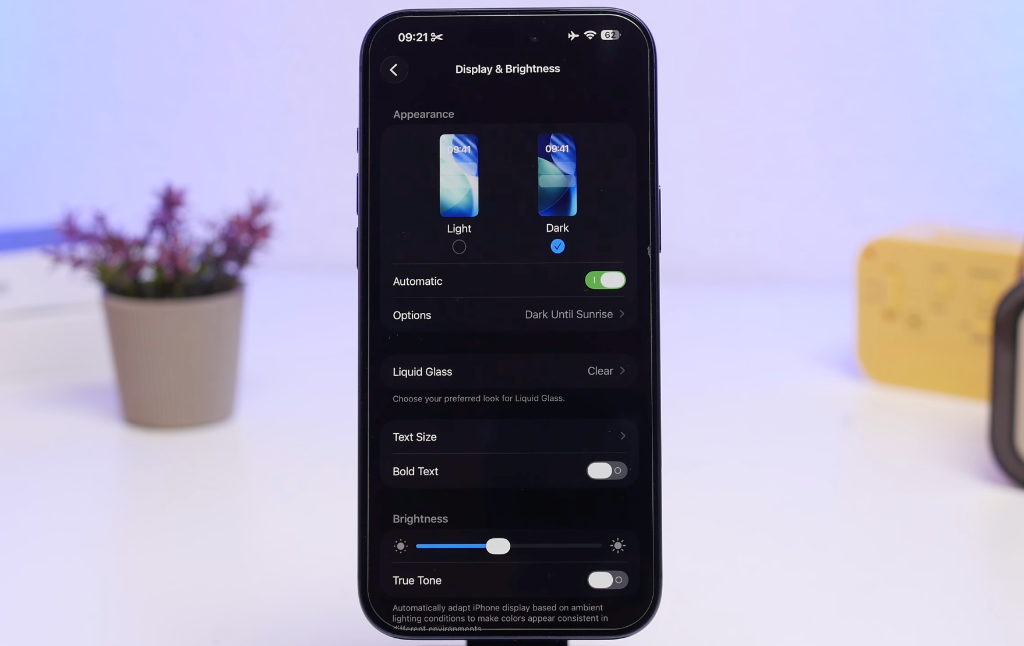
- Launch the official Settings app on your iPhone.
- Scroll down and select Display & Brightness.
- Under the Appearance heading, tap Dark to enable dark settings immediately.
To lock this environment permanently, disable the Automatic switch. This prevents iOS from transitioning back to light mode at sunrise. If you prefer to utilize light mode during bright daylight hours, you can keep the automatic toggle active and tap Options to establish a custom schedule, specifying the precise hours you want your Ultra Dark Mode environment to govern your device.
Step 3: Accessibility Enhancements & The Liquid Glass Tint
iOS 26 introduces a revolutionary visual rendering system called Liquid Glass. This option adds elegant depth and transparent refractions to menus, backgrounds, and sheets. To optimize this feature for an ultra-dark layout, you can enable the custom "Tinted" option:
- Navigate to Settings and select Display & Brightness.
- Tap on the Liquid Glass options submenu.
- Switch the setting to Tinted.
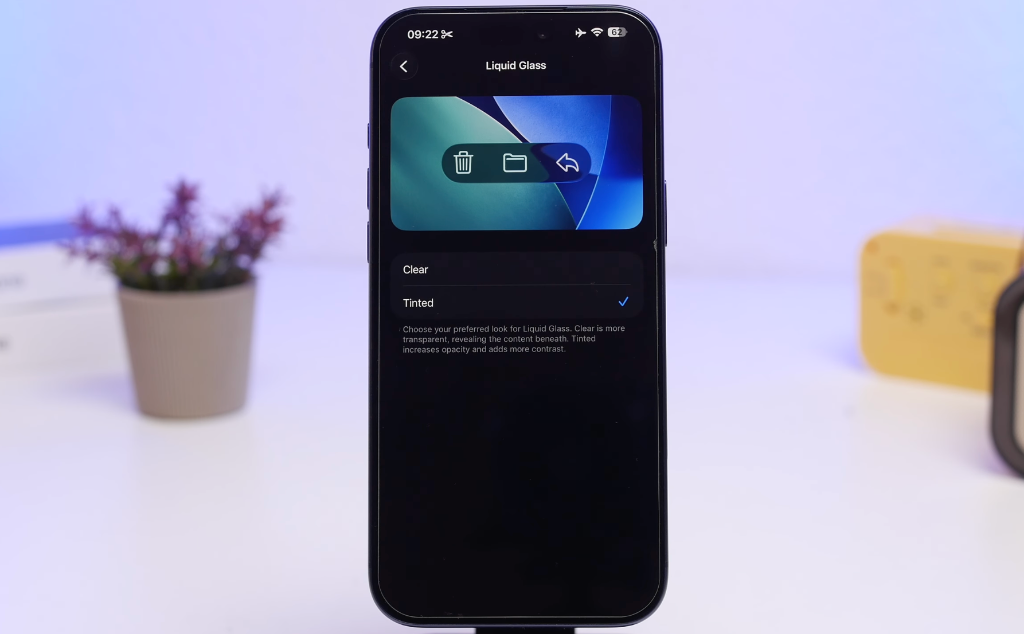
This adjustment immediately darkens every background menu layer, converting standard dark gray elements into deep, ink-like black sheets.
If you intend to combine Reduce Transparency with Tinted Liquid Glass, you must execute the settings in a specific sequence. You must enable the Tinted Liquid Glass option FIRST, and only then navigate to Accessibility to toggle Reduce Transparency. If you attempt to activate them in reverse, the system will prevent the transition and request that you disable transparency reductions beforehand.
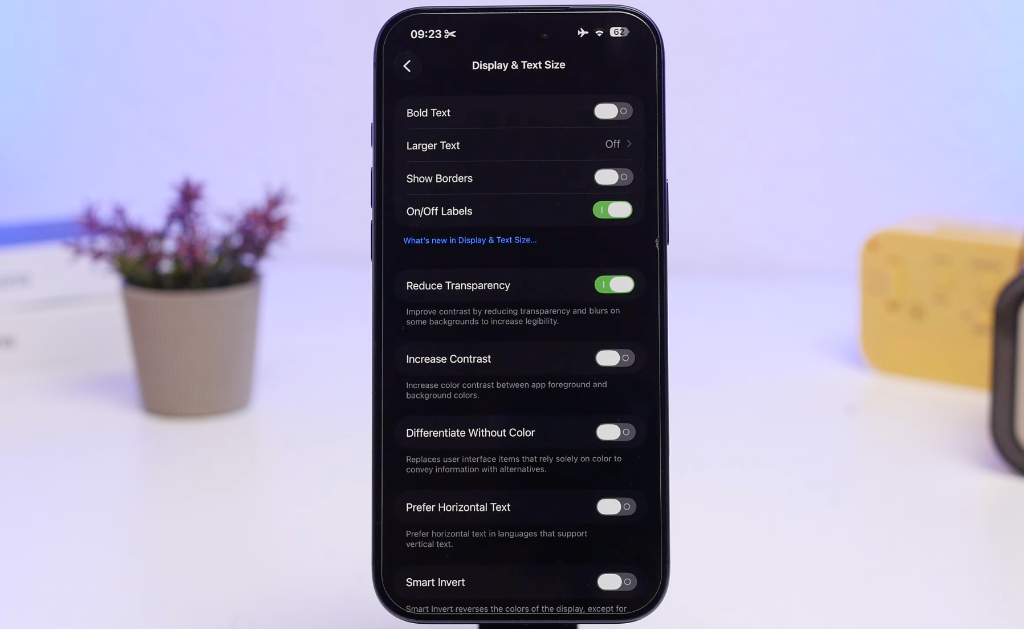
After setting up your tinted liquid glass, navigate back to the main settings page, open Accessibility, select Display & Text Size, and toggle on Reduce Transparency. This eliminates lighter transparent blurs, locking down a uniform, solid dark color across every application and folder dock.
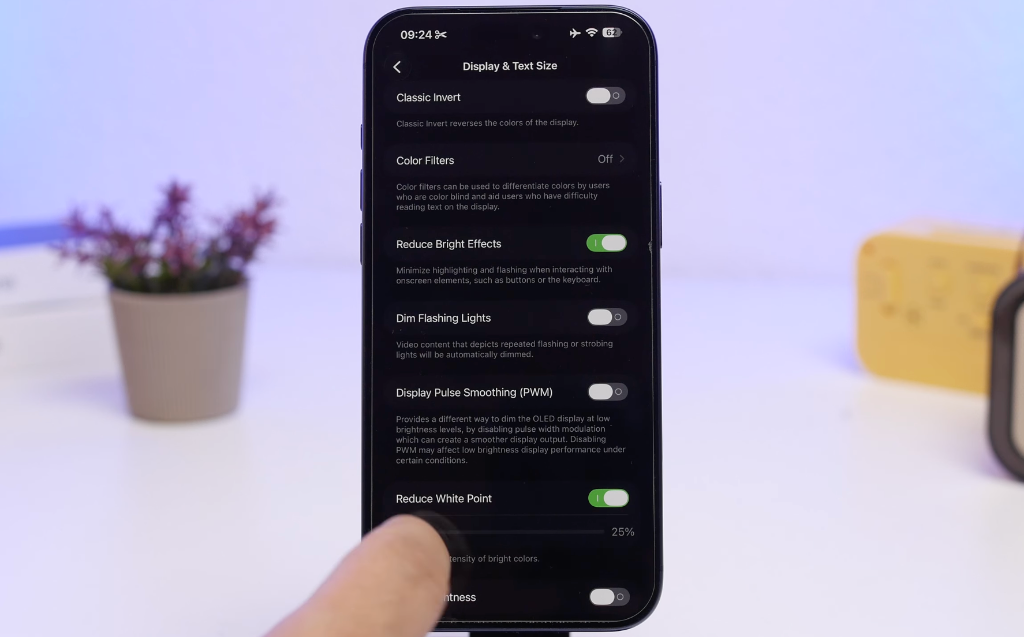
Step 4: Dimming Toggles (Reduce Bright Effects & White Point)
To achieve the ultimate dark layout and reduce harsh illumination in pitch-black rooms, iOS 26.4 introduces a highly anticipated toggle called Reduce Bright Effects. When enabled under accessibility, this option automatically suppresses extreme highlights and light refractions generated by your liquid glass theme, rendering a beautifully subtle, matte visual environment.
To take this a step further, look immediately below that toggle and enable Reduce White Point. This system feature scales down the intensity of bright colors, allowing you to dim your screen beyond the standard hardware slider limits. For comfortable daily usage in varied lighting conditions, keeping this setting set between 25% and 30% is highly recommended. It significantly lowers display glare while preserving rich detail.
Step 5: The "Show Borders" Design Revolution
When your display is entirely dark, navigating complex application sheets or identifying separate controls can sometimes feel challenging. Fortunately, iOS 26 introduces a brilliant accessibility option called Show Borders:
- Open the Settings app and tap Accessibility.
- Select Display & Text Size.
- Scroll down and toggle the switch for Show Borders.
This instantly draws razor-sharp, elegant, high-contrast borders around every critical user interface element on your screen. You will immediately notice crisp borders framing your app icons, folder containers, dock background, control center toggles, and lock screen widgets. It creates a stunning matrix-like layout that makes navigation incredibly intuitive while looking spectacular.
Step 6: Home Screen Customization (Dark Icons & Dimming)
To ensure your home screen matches your new environment perfectly, customize your app icons:
- Long-press on any empty space on your home screen to enter edit mode.
- Tap the Edit button in the top-left corner and select Customize.
- Tap Dark to apply custom dark icon sets natively.
- To dim your wallpaper even further, tap the Tinted icon at the bottom of the customizer panel. You can adjust the sliders to add a custom dark violet tint, matching your glowing background outlines beautifully.
Step 7: Lock Screen Clock Styling
When displaying an Ultra Dark Mode layout, standard bright clock numerals can look out of place. To adjust your lock screen clock:
- Wake your iPhone and long-press your lock screen to open the theme editor.
- Tap Customize at the bottom of the screen and select Lock Screen.
- Tap on your clock widget to open the text editor.
- If you are using liquid glass styles, you can drag the opacity slider down to achieve a sleek, semi-transparent layout.
Because you have enabled the Show Borders toggle under accessibility settings, a gorgeous white outline will frame your clock numerals. This ensures the time remains perfectly legible and easy to read, even when you scale the clock opacity down to near-invisible levels.
Official Video Walkthrough
To see these visual transformations in action and follow along with a visual settings walkthrough, watch the detailed video guide below. It demonstrates the precise setting sequences, shows side-by-side contrast comparisons, and highlights the incredible aesthetic appeal of this Ultra Dark Mode configuration:
Be sure to support the creator by subscribing to their channel for more exceptional iOS customization techniques, performance guides, and settings walkthroughs.
Summary: The Ultra Dark Mode Settings Checklist
To quickly review and confirm your new Ultra Dark Mode configuration, use this step-by-step checklist:
| Setting Name | Menu Path | Target Action |
|---|---|---|
| System Dark Mode | Display & Brightness | Select Dark, Disable Automatic |
| Liquid Glass | Display & Brightness | Set to Tinted (Execute FIRST) |
| Reduce Transparency | Accessibility → Display & Text Size | Toggle ON |
| Reduce Bright Effects | Accessibility → Display & Text Size | Toggle ON |
| Reduce White Point | Accessibility → Display & Text Size | Toggle ON, Set slider to 25% - 30% |
| Show Borders | Accessibility → Display & Text Size | Toggle ON |
| App Icon Style | Home Screen Edit → Customize | Select Dark or Tinted |
Frequently Asked Questions (FAQs)
Yes. If your iPhone features an OLED display (found on iPhone X and newer models, excluding SE models), black pixels are physically turned off. Using a mostly black wallpaper and darkening all UI elements ensures these pixels consume zero battery power, leading to noticeable battery savings.
Liquid Glass is a visual rendering system introduced in modern iOS versions. Setting it to Tinted automatically darkens all standard gray sheets, system folders, and navigation menus, transforming them into beautiful solid black regions.
Apple's display engine prevents Tinted Liquid Glass from rendering if transparency reductions are already active. To solve this, simply toggle OFF Reduce Transparency under Accessibility settings, enable the Tinted Liquid Glass setting under Display & Brightness first, and then toggle Reduce Transparency back ON.
Reduce White Point lowers the intensity of bright, highly saturated colors on your screen. It is an excellent way to dim your display beyond standard hardware limits for a more comfortable nighttime reading experience.